Binding to the Digisigns server
The Taurus connects to Digisigns through the VNNOX platform. Point the player at the Digisigns server in ViPlex Express (Windows).
Before you start
- The Taurus must have a working internet connection — see Configuring networks.
- Install ViPlex Express on a Windows PC on the same network as the player.
- Have the player's admin password ready (printed on the SSID label).
Bind the player
- Connect your PC to the Taurus (over the same network, or via the player's Wi-Fi AP), then open ViPlex Express.
- Click Refresh to update the screen list. A green icon means the player is online and available to log in; a red icon means it is offline.
- Click Connect next to the player, enter the admin password, and click OK.
- Go to Control → Server configuration and select the player from the terminal list.
- In the Bind to VNNOX Standard/AD section, enter the Digisigns server details exactly as below:
| Field | Value |
|---|---|
| Server Address | https://api-in.vnnox.com |
| Authentication User Name | digisigns |
| Authentication Password | Provided by Digisigns Support |
Note
For security, the authentication password is not published here. Email
support@digisigns.in to obtain the password for your
account.
- Click Bind.
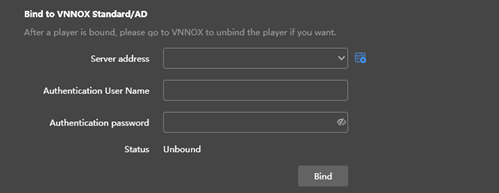
The Bind to VNNOX Standard/AD dialog in ViPlex Express.
The player registers with the Digisigns server within a minute. Next, add it to your account — see Pairing in the Digisigns dashboard.
Warning
Enter the server address and credentials exactly as shown, including https://. An
incorrect value will stop the player from binding.