Amazon Signage Stick
The Amazon Signage Stick is affordable, reliable, and delivers great performance.
Whether you're setting up a single display or managing a large-scale network, the Signage Stick offers a professional, cost-effective solution, backed by the reliability of the Amazon brand.
Installing Digisigns on the Amazon Signage Stick is a simple an easy process:
- Once you connect and start the Signage Stick, press ⏯ (play/pause) when prompted to start configuring the device.
- Next, select your preferred language and connect to a Wi-Fi network.
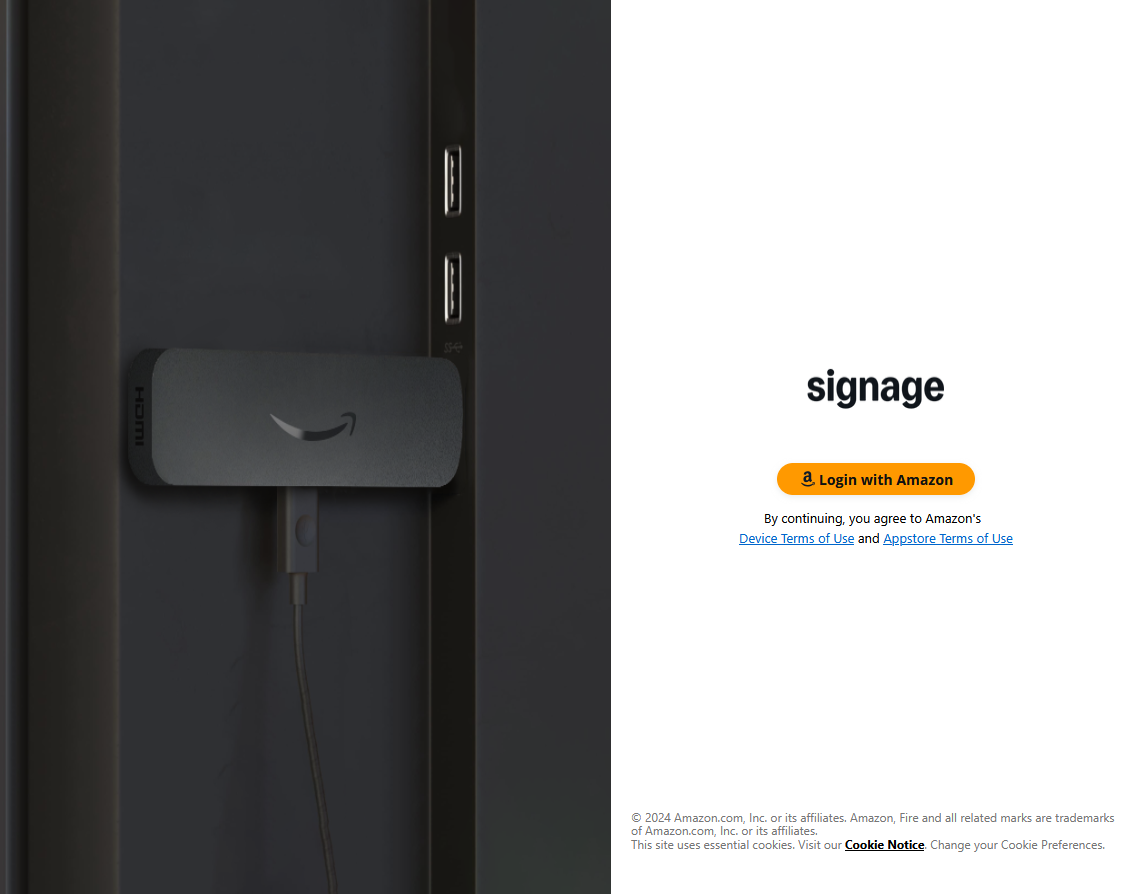
- Once connected to the Internet, a pairing code from Amazon will be displayed on the screen. Follow the instructions and login at the Amazon Signage Stick Console.
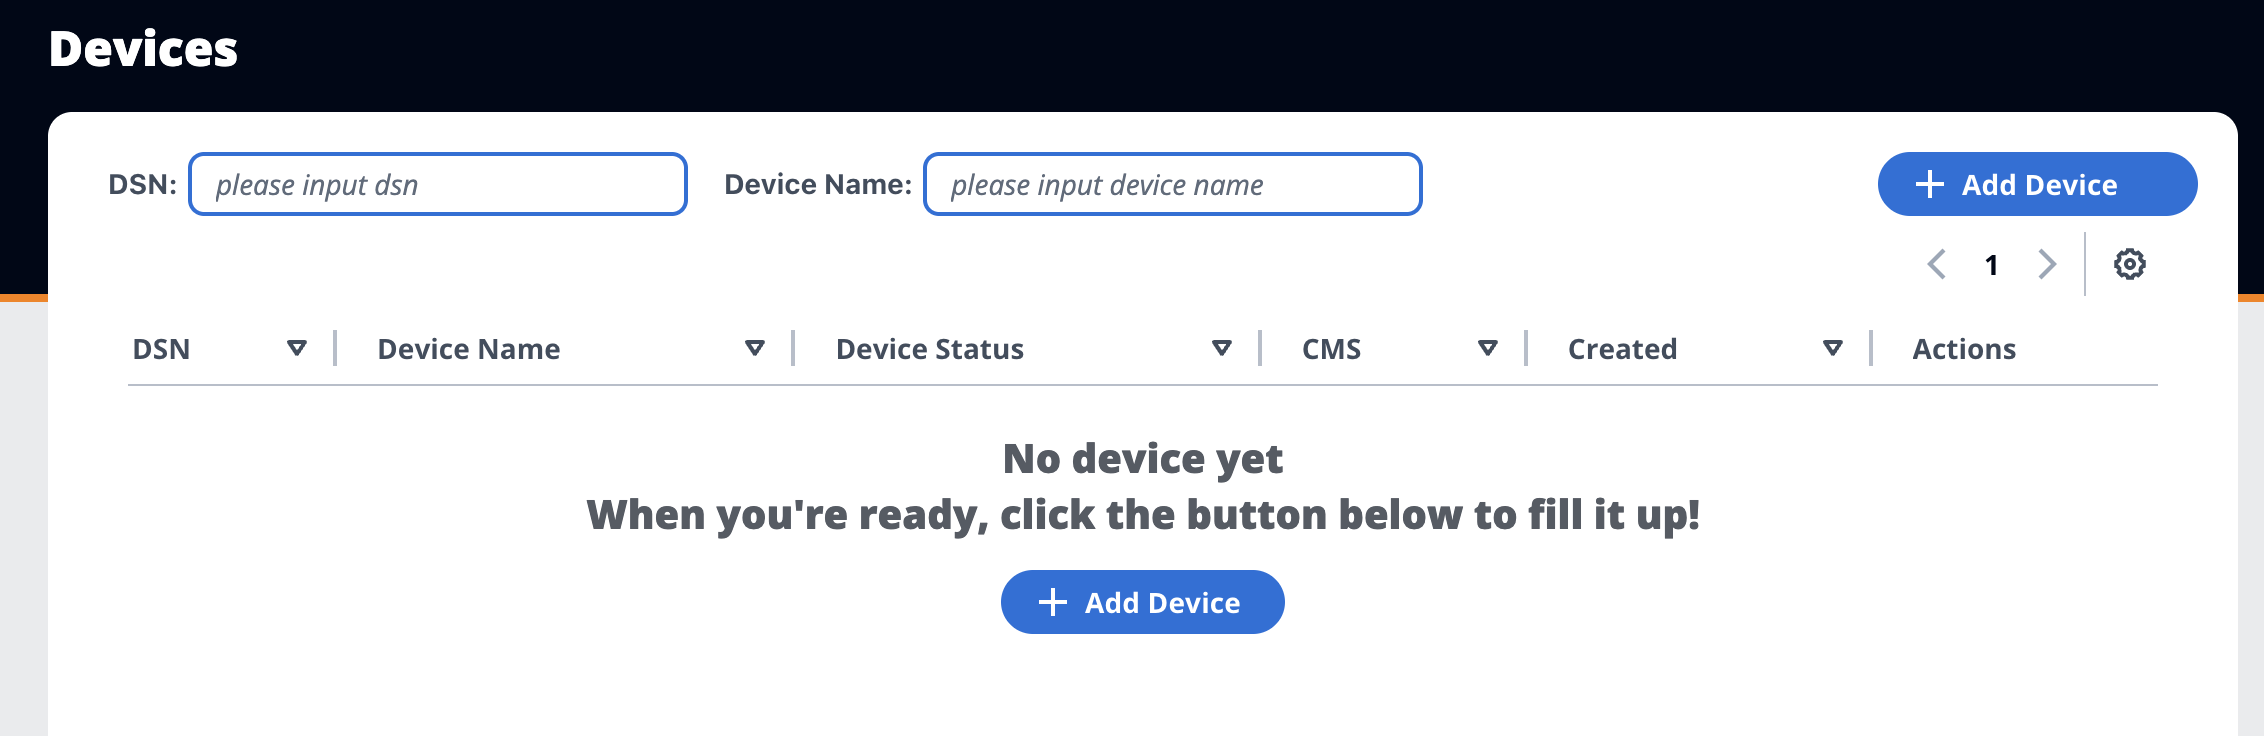
- If it's your first Signage Stick on the account, a screen will pop-up to insert the pairing code. Otherwise, click on the blue “+ Add Device” button on the top-right corner of the control panel.
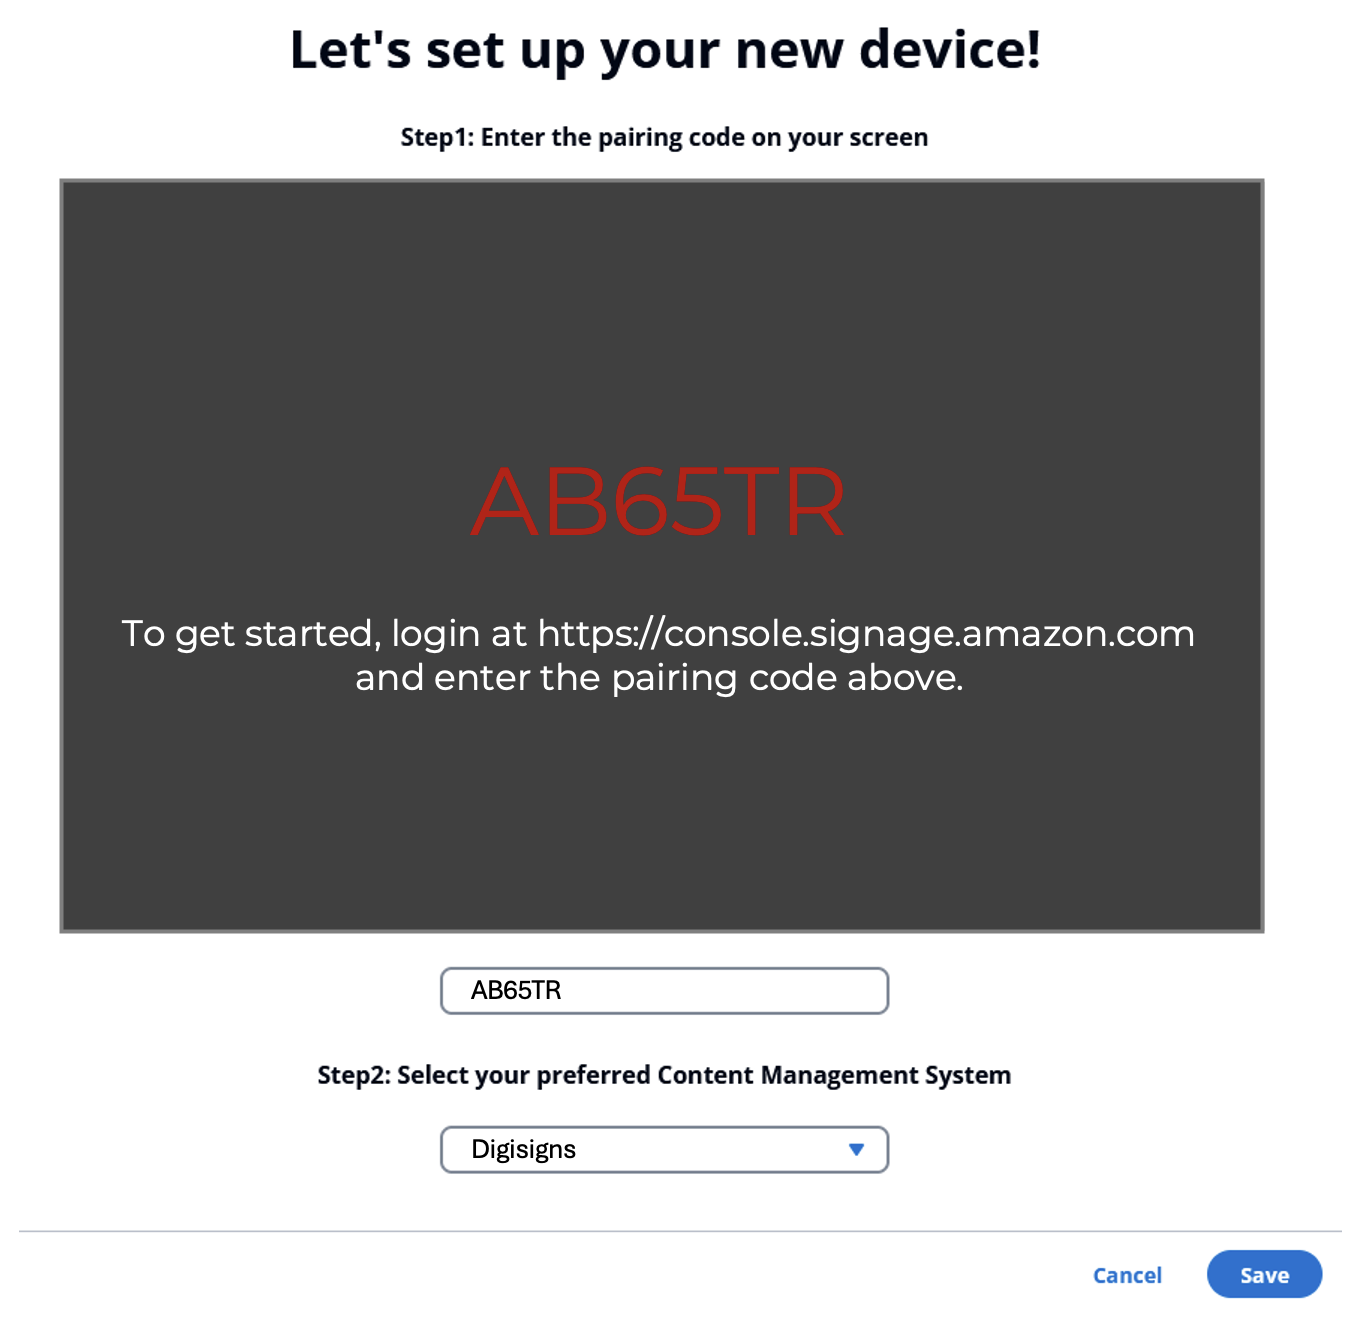
- Enter your pairing code and select Digisigns at the "Step 2: Select your preferred Content Management System".
 5. Click on “Save” at the bottom-right corner.
6. Once you save, the device will restart and install the Digisigns App.
7. After the reboot, make sure to give all the requested permissions, as this is a requirement for running Digisigns.
8. Done! Now you should see the Digisigns pairing code. Log in to Digisigns and add the screen to your account.
5. Click on “Save” at the bottom-right corner.
6. Once you save, the device will restart and install the Digisigns App.
7. After the reboot, make sure to give all the requested permissions, as this is a requirement for running Digisigns.
8. Done! Now you should see the Digisigns pairing code. Log in to Digisigns and add the screen to your account.
Need more help?
*Take a look at the *Amazon's Signage Stick Support Page:
- Setup the Signage Stick in Portrait mode
- How to update the WiFi on the Signage Stick
- Reset Your Signage Stick to Factory Settings
- How to connect your Signage Stick to an ethernet cable
- How to add a Signage Stick to your Amazon Management Console